Crop Cycle
Once we have defined our crop, we can create as many crop cycles as we like, using the parameters outlined previously
On the desk, clik on the Crop Cycle icon. A list will show any existing Crop Cycles.
Agriculture > Crop Cycle
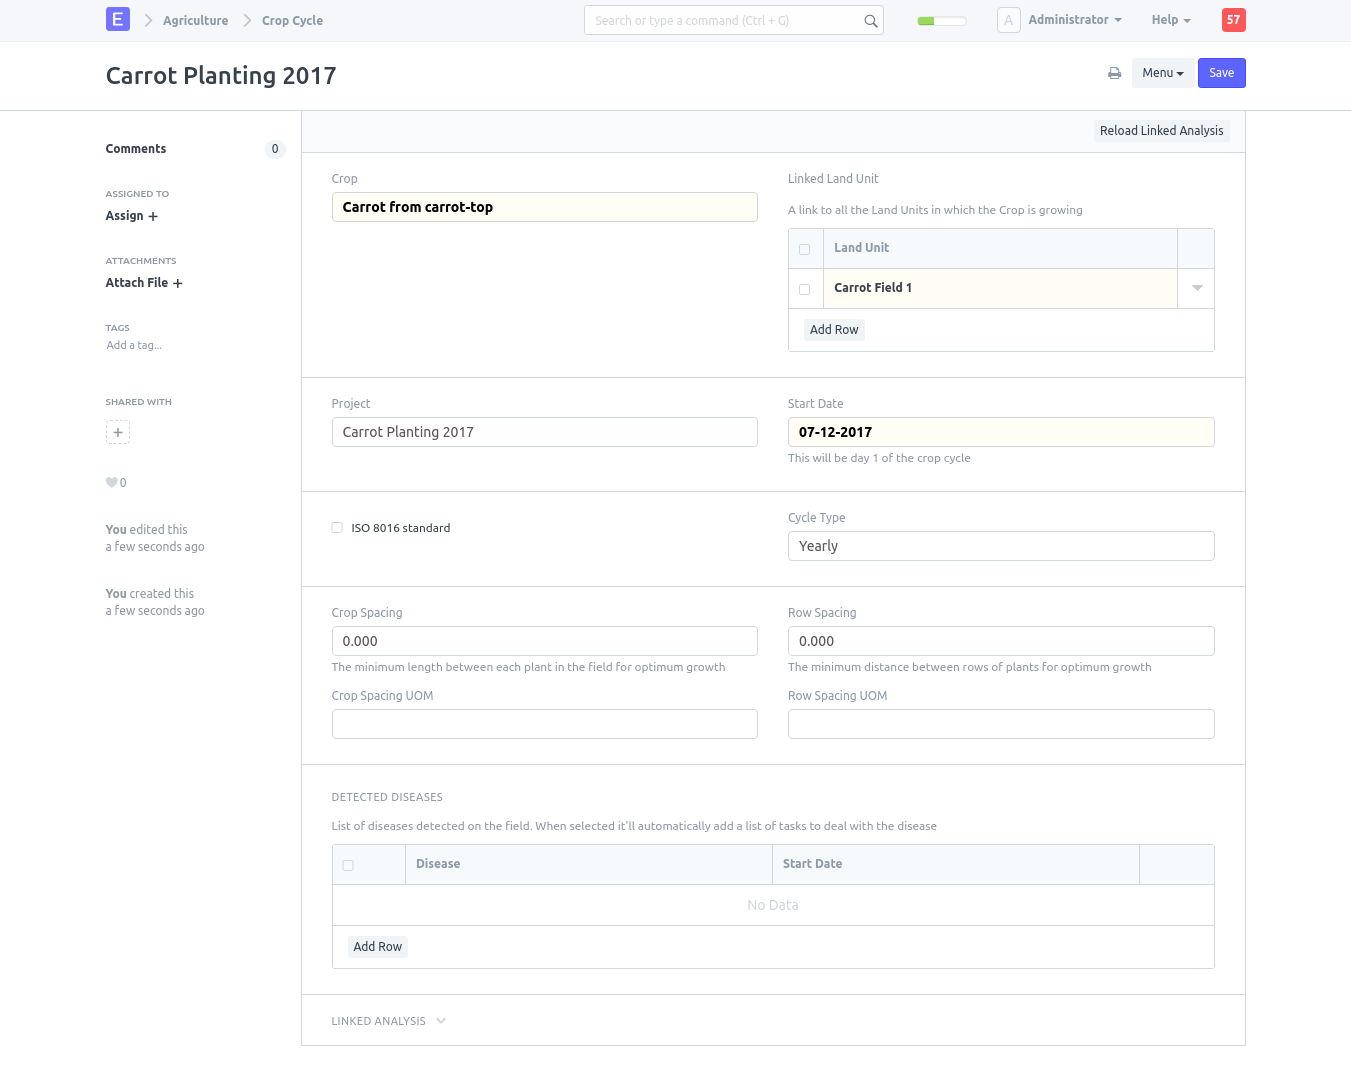
On the top right, click on New to create the first Crop Cycle. A new Crop Cycle document will open, and right away you see that two of the required items are a Land Unit and a Crop. We shall give it a descriptive name, to differentiate it from Crop Cycles we might create later.
- Title: Carrot Planting 2017
- Land Unit: Add a row, and select, Carrot Field 1
- Crop: Carrot from carrot-top
- Start Date: Today
- Leave the ISO 8601 Standard (week count) box unchecked
- Skip the next four fields for Crop Spacing
Save the new Crop Cycle
It should now look something like this

Repeat these for every Crop Cycle you need
As you can see a Project was created, with the same name as the Crop Cycle and linked to the Crop Cycle. If you click on the project, you'll see all the 'Sample Tasks' from the linked Crop, i.e. 'Carrot from carrot-top' in this case, were converted into actual 'Tasks' and linked to the Project, for easy management
Projects > Project
