Patient Appointment
ERPNext Healthcare allows you to book Patient Appointments for any date and alert patients via Email or SMS. You can easily organize appointments for each Practitioner based on their availability schedules.
To create a Patient Appointment, go to:
Home > Healthcare > Consultation > Patient Appointment
1. Prerequisites
Before creating a Patient Appointment, these need to be created first:
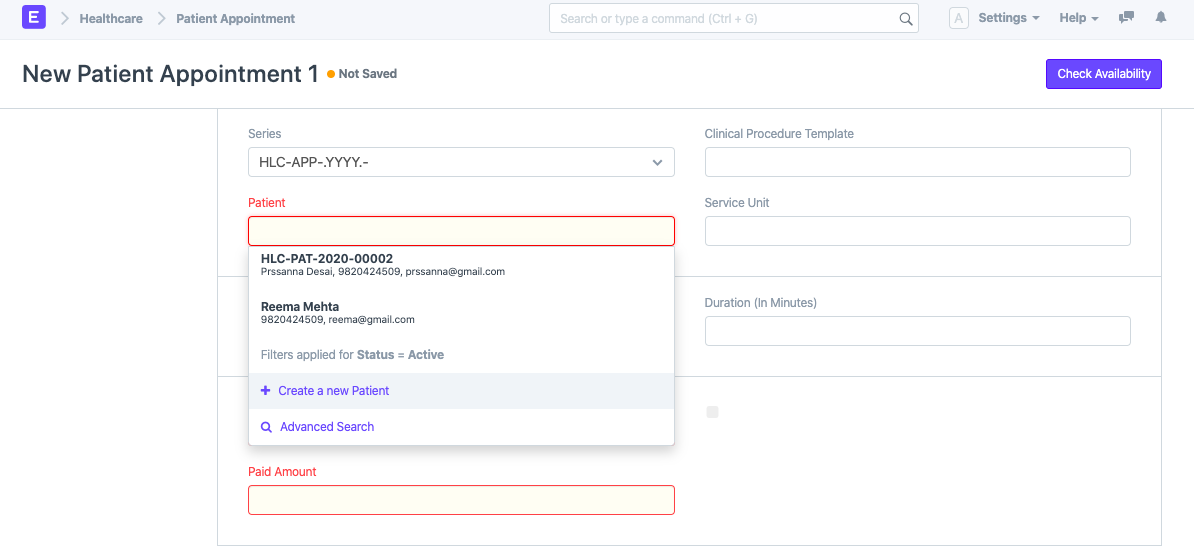
You can book appointments for a registered Patient by searching for Patient by Patient ID, Name, Email or Mobile number. It is also possible to register a new Patient from the Appointment screen itself by selecting "Create a new Patient" in the Patient field.
2. How to Create a Patient Appointment
- Go to the Patient Appointment list, click on New.
- Select the Patient for which you want to set up an Appointment. The Patient Name, Gender, and Patient Age will be auto-fetched on selecting the Patient. If the patient is an Inpatient (Admitted) then the Inpatient Record will also be auto-fetched for them.
- You can optionally select the Service Unit where you would want to schedule the appointment.
- If you need to book Appointment for Clinical Procedure select a Clinical Procedure Template. If you want to select a Clinical Procedure which has been prescribed for the patient in the previous Patient Encounter click on Get Prescribed Clinical Procedures button to select from a list of Clinical Procedures that are prescribed for the selected Patient. The same process applies to fetch the prescribed Therapy Types using the Get Prescribed Therapies button or just selecting a Therapy Type.
- You can optionally select the "Appointment Type" and the "Duration (in minutes)". Note that, selecting the "Appointment Type" will automatically set the duration of the appointment as configured in the Appointment Type. This will allow you to override the duration of appointments set by the Practitioner Schedule and the time slots will adjust to the next available time automatically.
- If you have checked "Automate Appointment Invoicing" in Healthcare Settings, setting the "Mode of Payment" and "Amount" fields in Patient Appointment is mandatory.
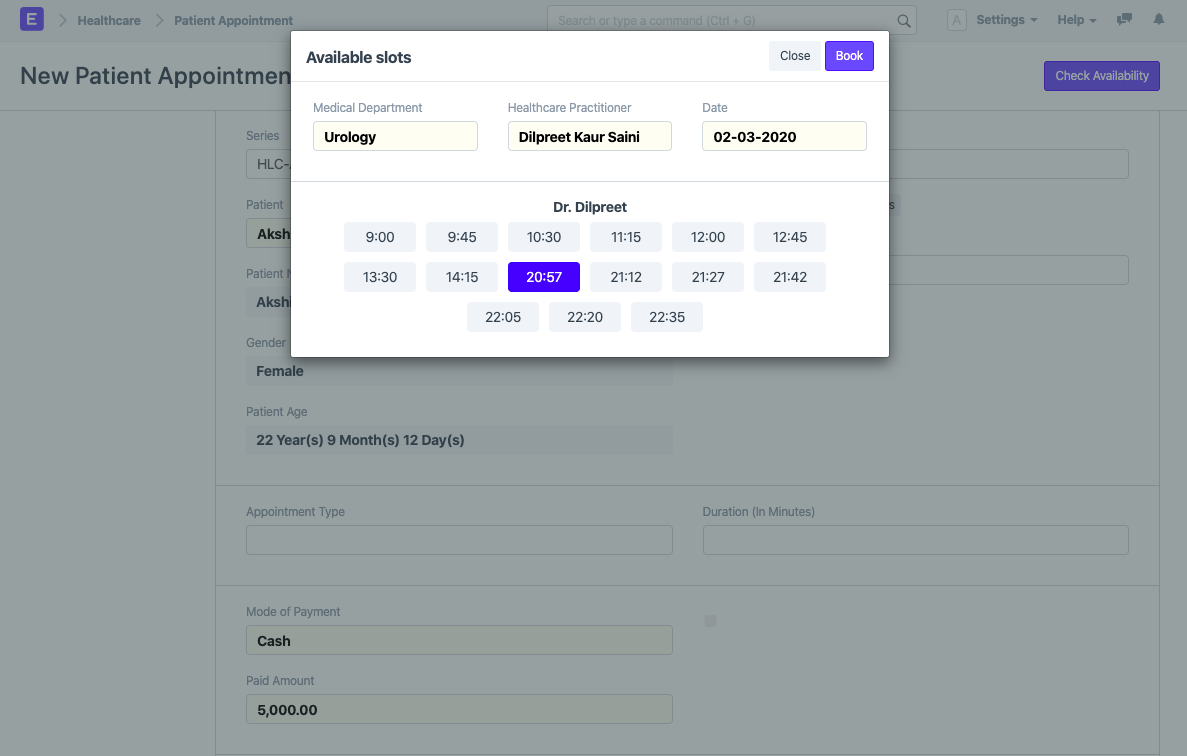
- Then click on the Check Availability button. It will allow you to select the Medical Department, Healthcare Practitioner and Date for which the appointment is to be booked. On selecting the details, all the available time slots for the practitioner will be fetched from the Practitioner Schedule and displayed with status indicators for the selected date. You can select a time slot and hit Book.
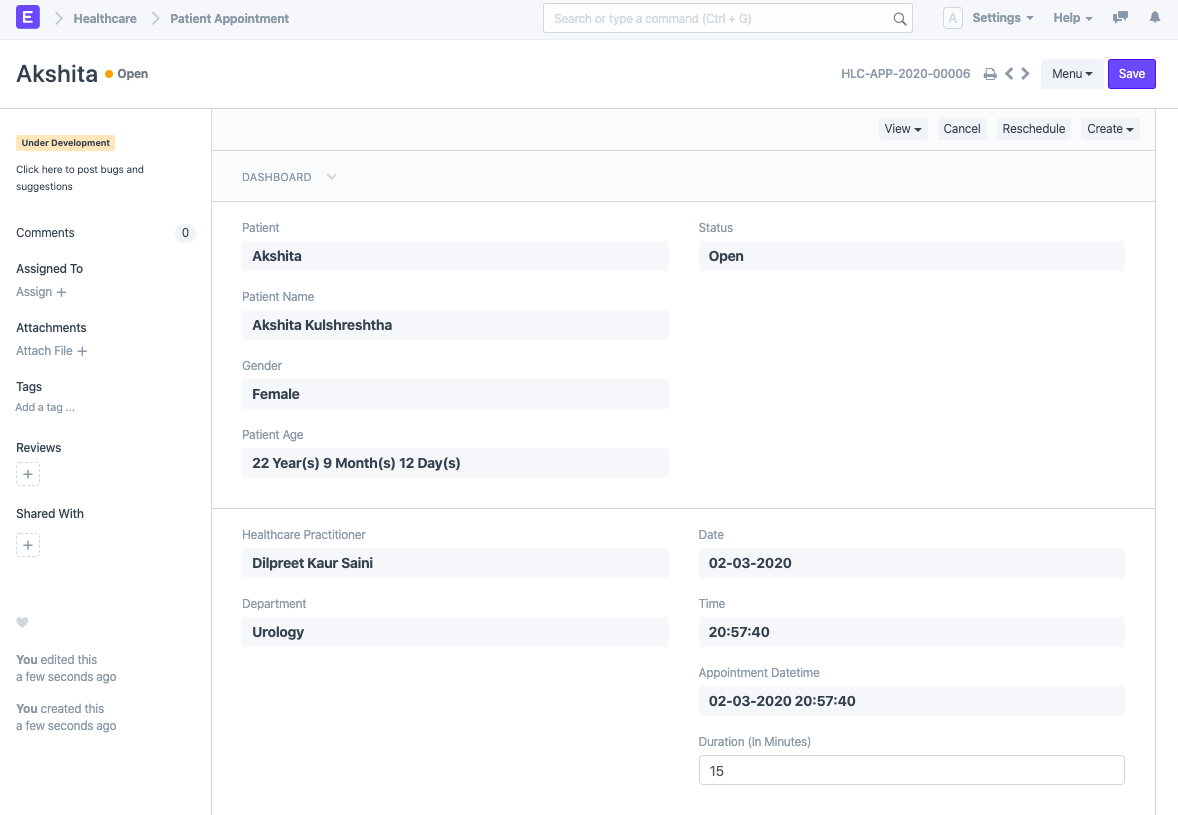
- Once booked, the scheduled time of the Appointment and the Service Unit as per the Practitioner and appropriate Status will be set in the document.
3. Features
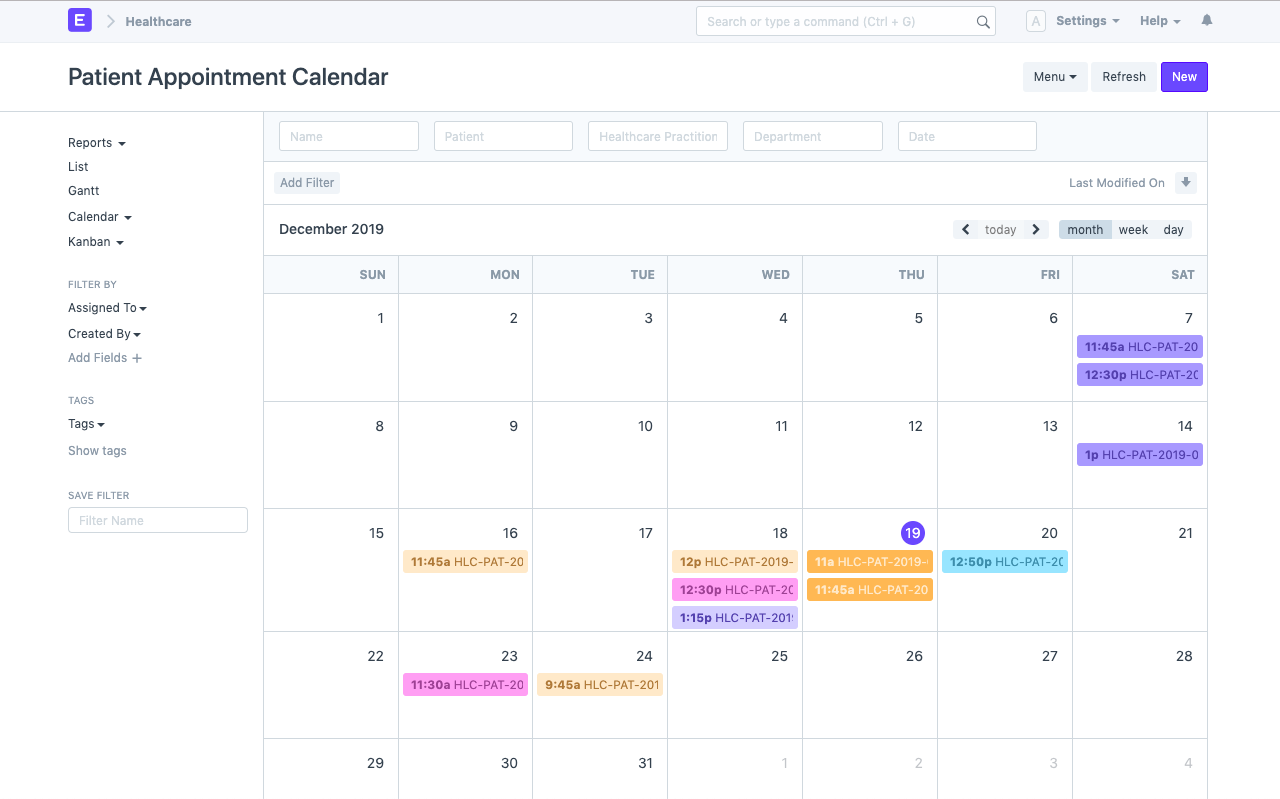
3.1 Patient Appointment Calendar
You can click on "Calendar" view from the Patient Appointment list view. Types of Appointments can be differentiated by setting the "Color" field in Appointment Type
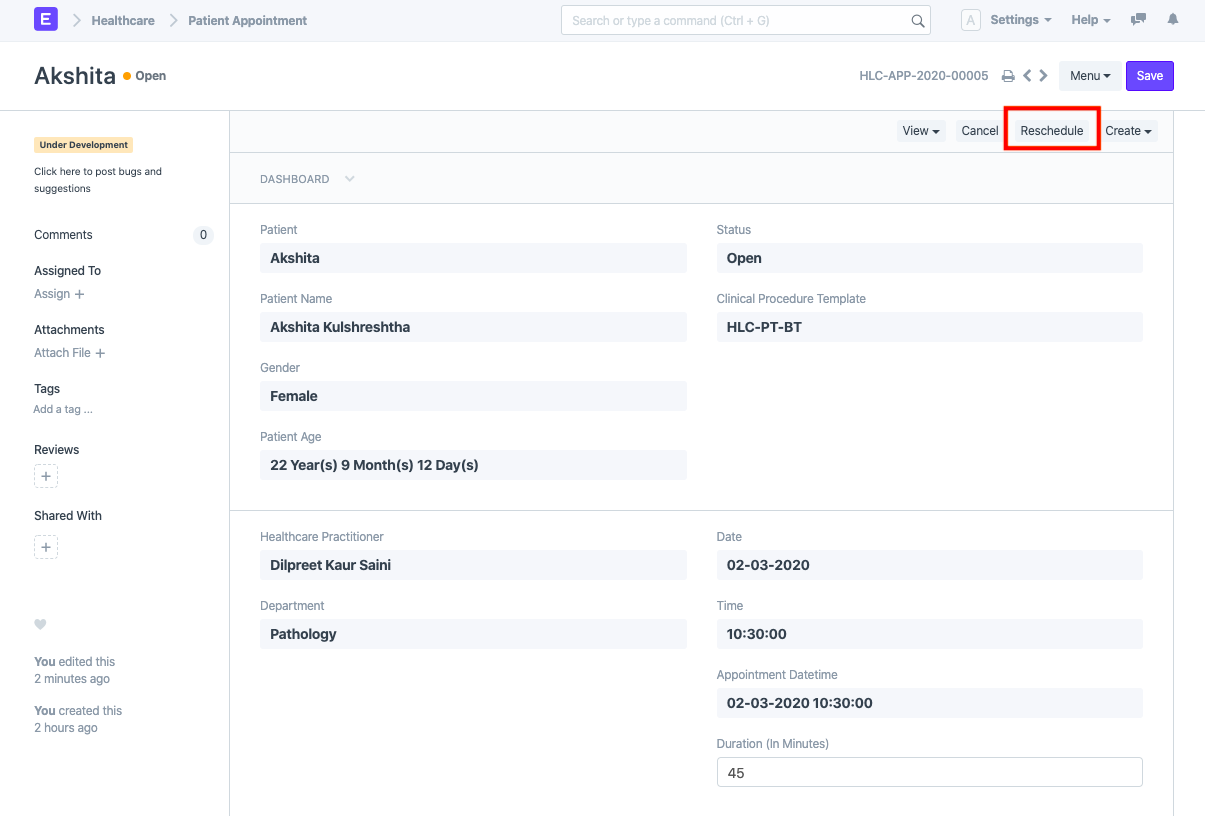
3.2 Appointment Rescheduling
You can reschedule the Patient Appointment by clicking on the Reschedule button in the document and following the same steps.
3.3 Managing Schedules
Patient Appointment booking considers any "Approved" Leave Applications for the Practitioner (Employee linked in the master) and does not allow booking Patient Appointments on such days.
While booking it also checks for Appointment Overlaps and restricts the booking for the same slots.
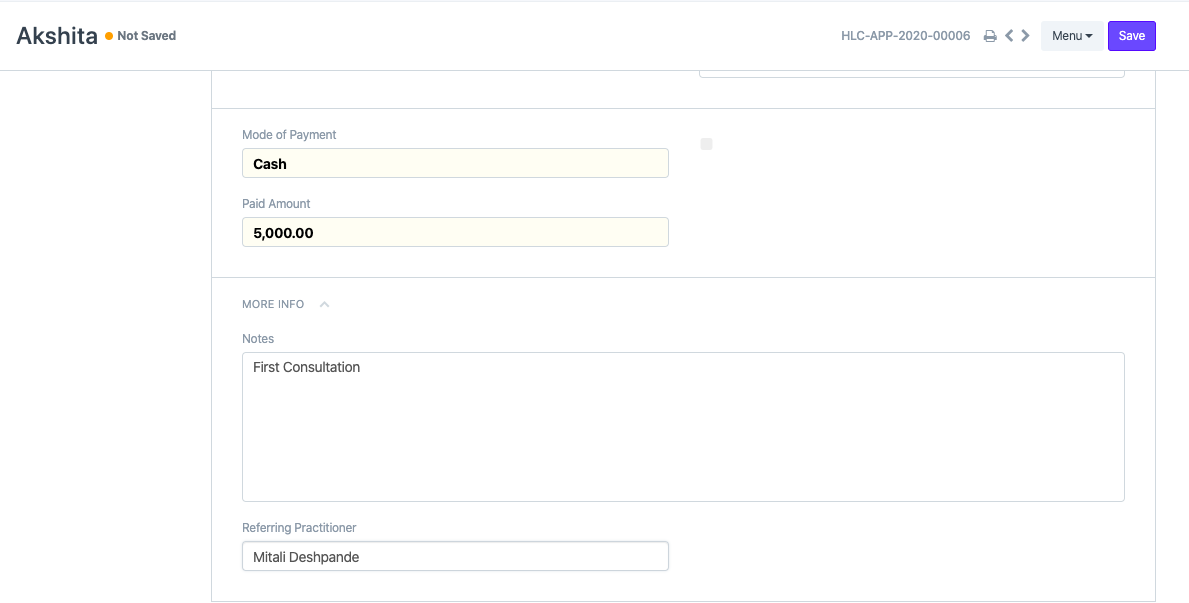
3.4 Notes and Referrals
In the "More Info" section of the Patient Appointment document, the user can add "Notes" and also select a "Referring Practitioner" to help track referrals.
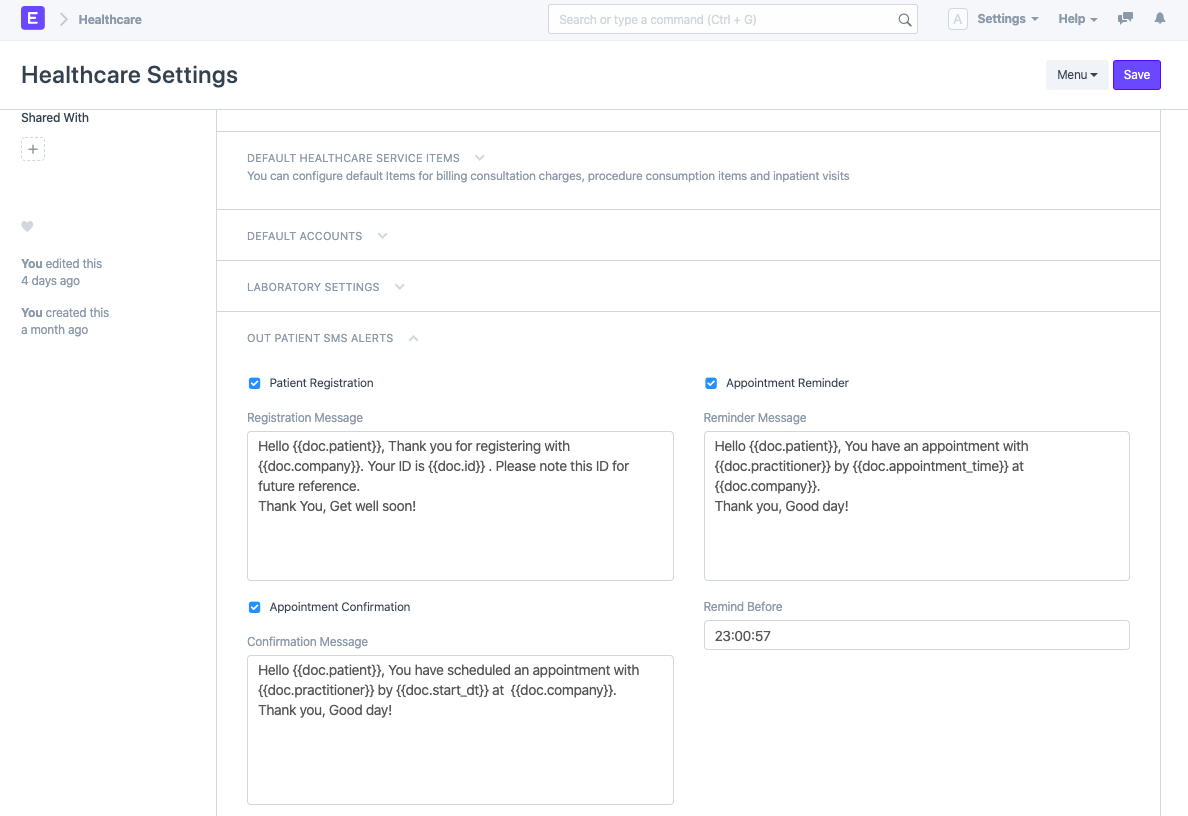
3.5 Out Patient SMS Alerts
Optionally, you can configure Healthcare Settings in ERPNext to automatically send an SMS alert to the Patients about the booking confirmation via "Out-Patient SMS Alerts".
3.6 Automate Appointment Invoicing
ERPNext Healthcare automatically creates a Sales Invoice as soon as you book a Patient Appointment. To enable this, you can check "Automate Appointment Invoicing" in Healthcare Settings.
If enabled, the Patient Appointment will prompt you to select the Mode of Payment and enter the Amount collected as the Consultation Charge.
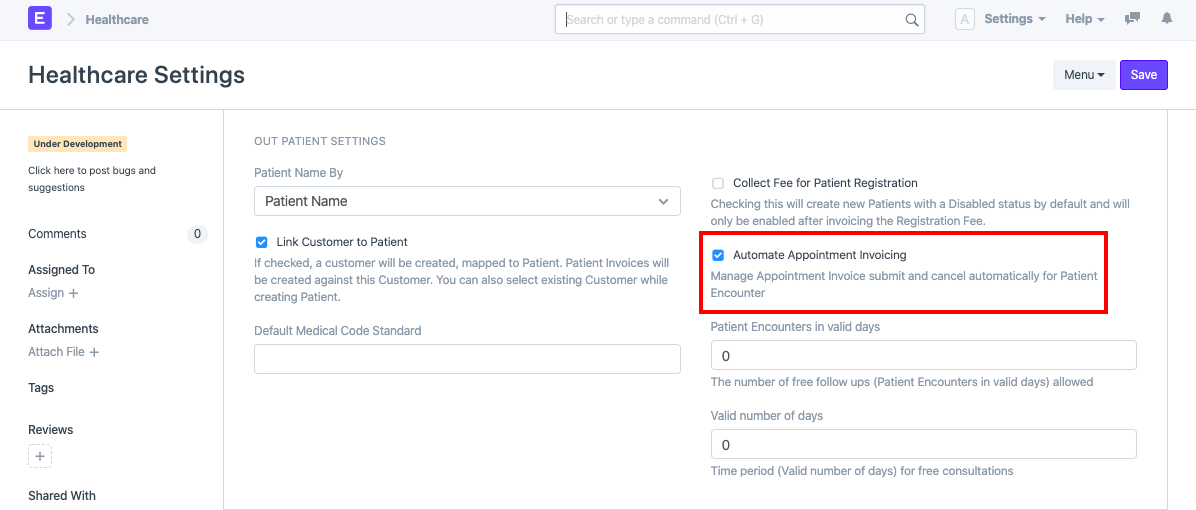
Note: If you have not enabled this, you can always use Get Items From > Healthcare Services in Sales Invoice
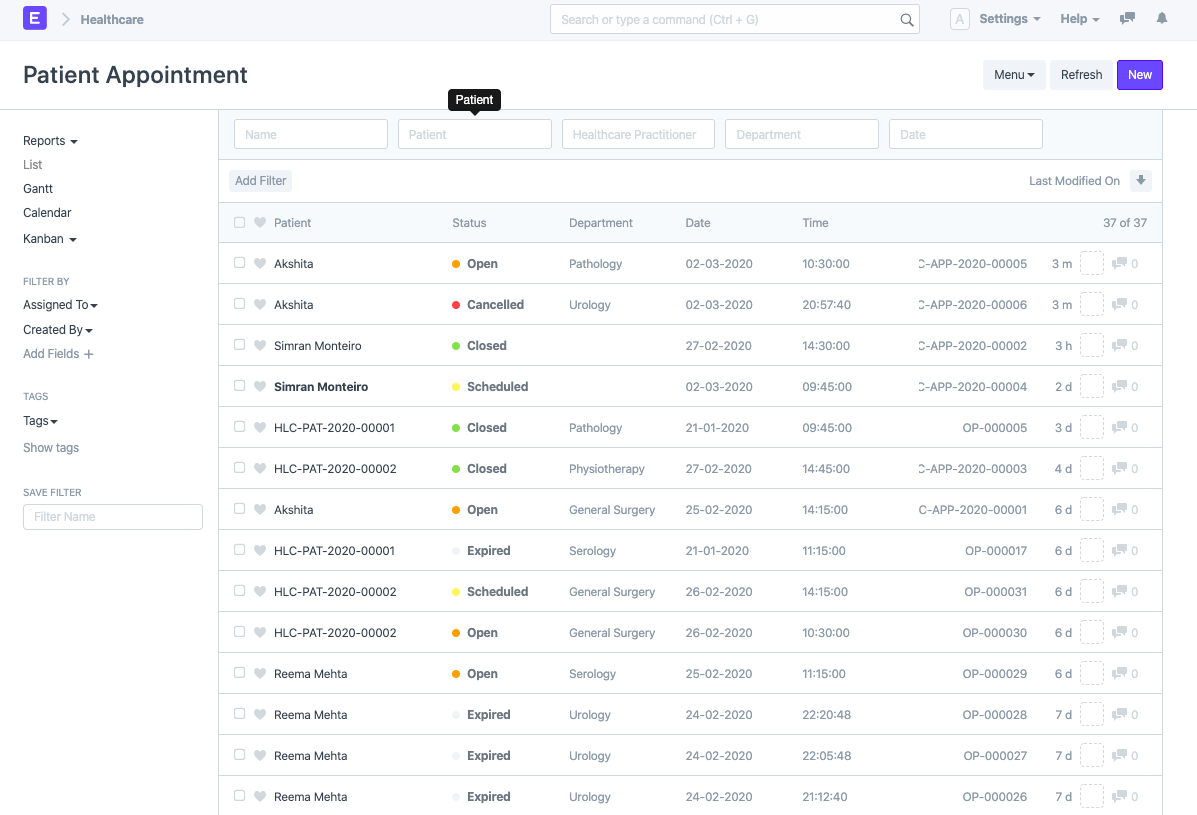
3.7 Status Indications
Status indicates the state of the Patient Appointment. The various Statuses are:
- Scheduled: When the Patient Appointment has not yet started but scheduled on a future date.
- Open: When the Patient Appointment has been scheduled for today.
- Closed: When a Patient Encounter or Clinical Procedure has been created for the Patient Appointment.
- Expired: When the Appointment date has passed and no Patient Encounter or Clinical Procedure has been created against it.
- Cancelled: When the Appointment is Cancelled.
4. Actions
Note: User should have appropriate privileges (User Role) to view the buttons
Vital Signs: Create > Vital Signs button will take you to the new Vital Signs screen to record the vitals of the Patient.
Encounter: From the Appointment screen you can directly create and record the "Patient Encounter" to record the details of the visit using the Create > Patient Encounter button.
To view the medical history of that patient click on View > Patient Medical History.
Reschedule: For rescheduling the Appointment.
Cancel: For canceling the Appointment
This Form has been Changed in Version 13