Tasks
In project management, a task is an actionable unit or activity which needs to be completed.
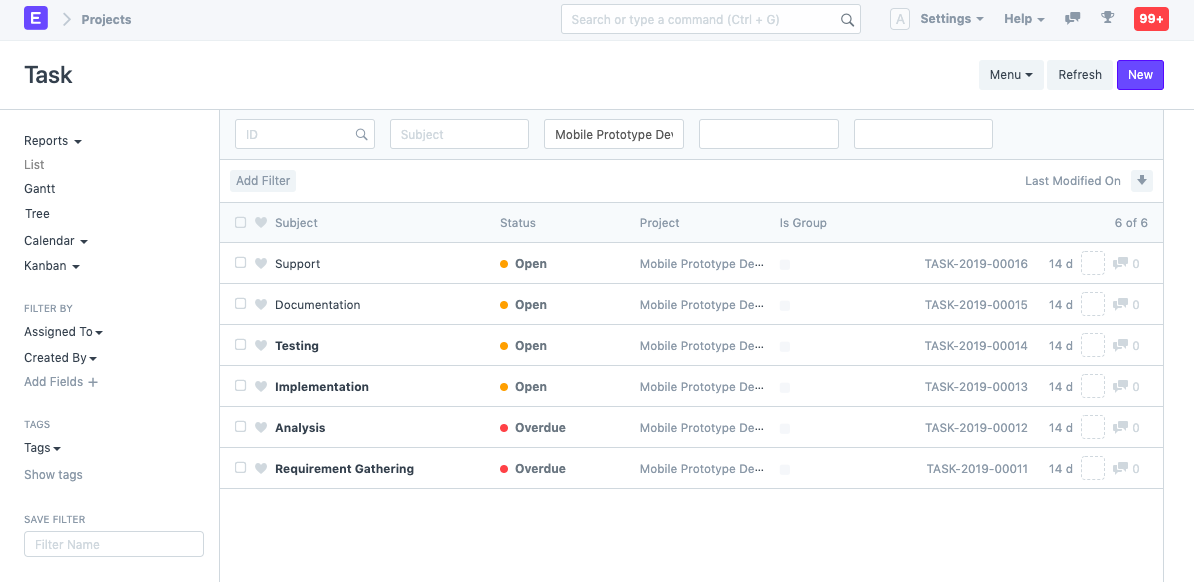
To access Tasks, go to,
Home > Projects > Projects > Task
1. How to Create a Task
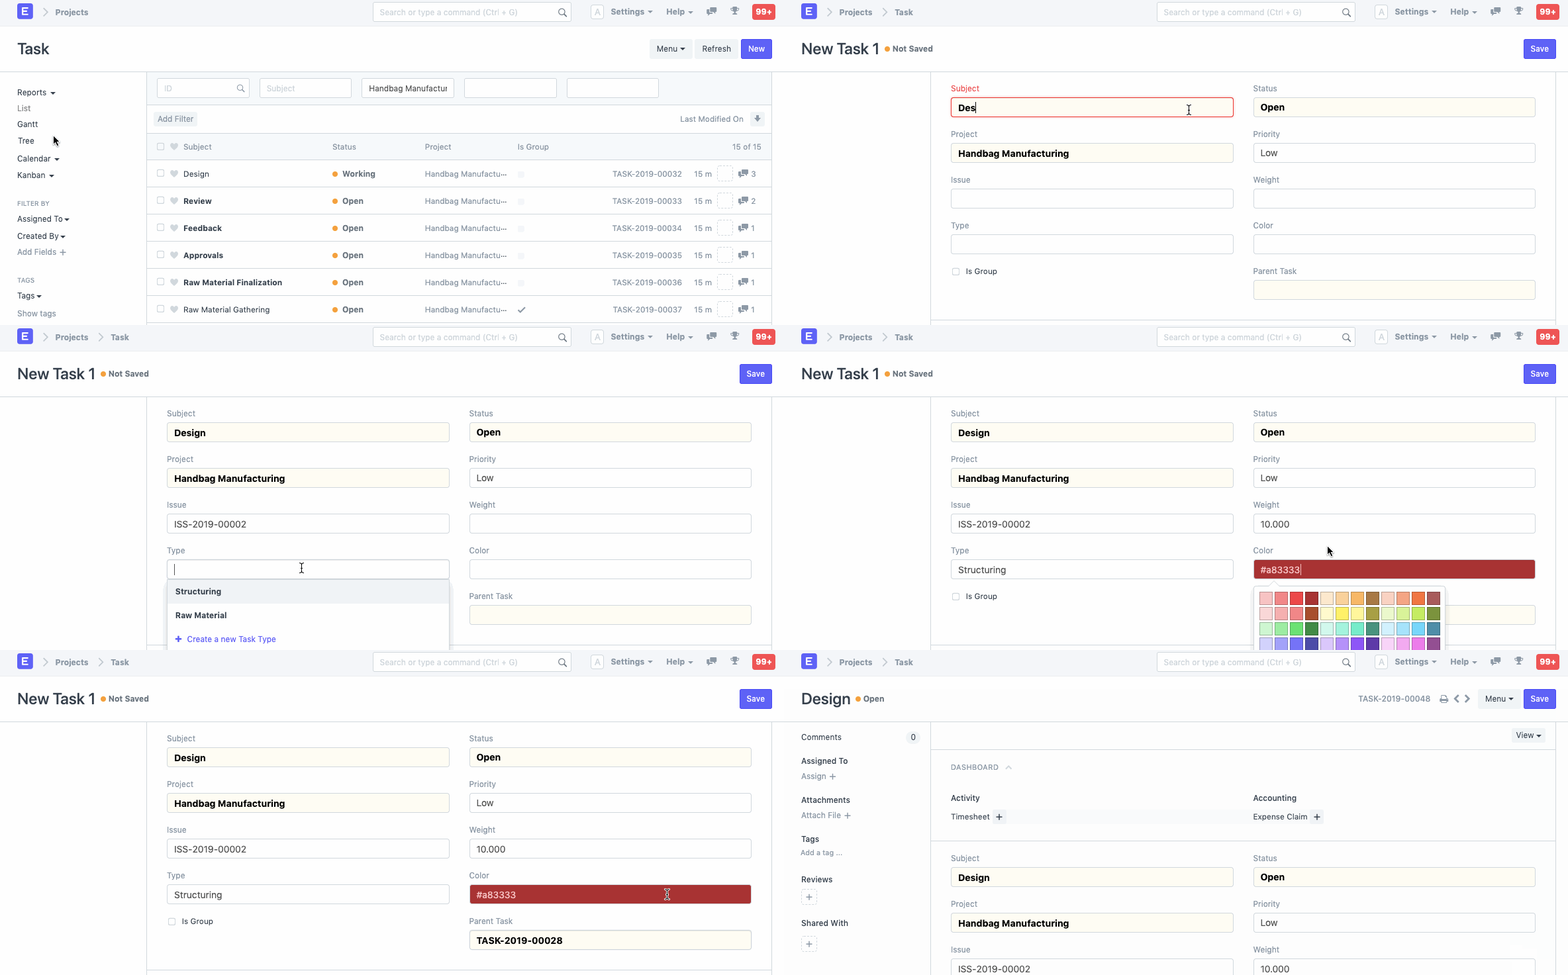
- Go to the Task List and click on New.
- Add the subject of the task.
Save.
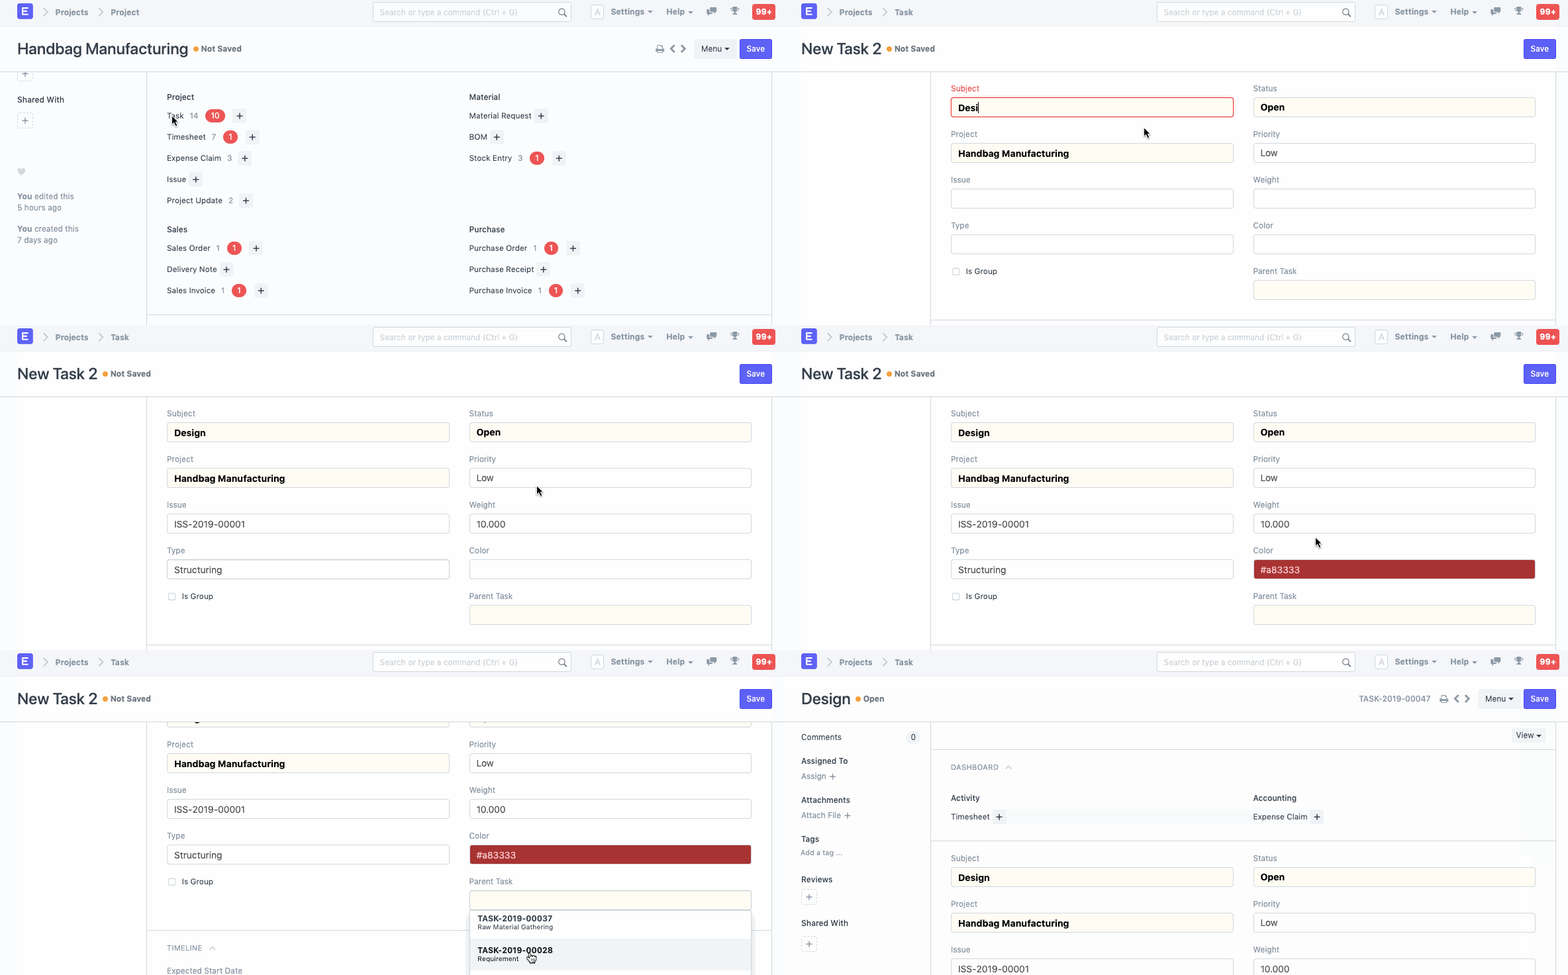
Alternatively, a task can also be created from a Project in the following way:
- Go to the Project for which you want to create a new task.
- Go to Task under the Project section on the Dashboard. The plus icon '+' here would direct you to the task creation page.
- Add the subject of the task.
Save.
1.1 Additional Options while creating a Project
The following additional details can be added when editing a new task:
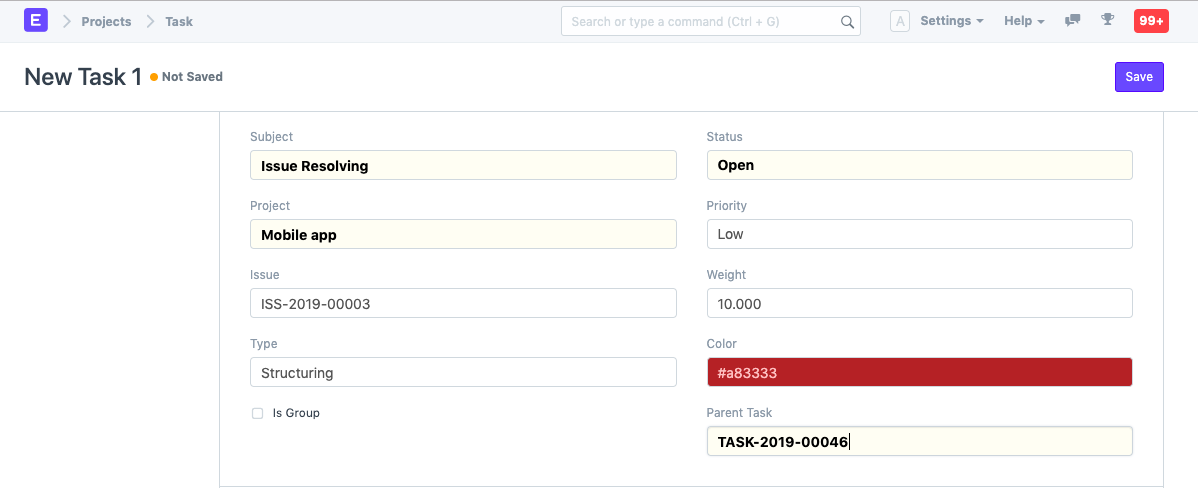
- Status: You can add the status of the Project or change the same whenever needed, e.g., from 'Open' to 'Working', 'Overdue','Pending Review','Completed', or 'Cancelled'
- Project: In case a task is added independently, you may choose to link the task to a particular Project. If the task is created from a Project, the details of the Project will get automatically added.
- Priority: You can choose to define the priority of the task, viz., Low, Medium, High or Urgent.
- Issue: If the task is an actionable that arises out of an Issue, that issue can be tagged here with the Task.
- Weight: If a particular task carries some weightage out of a project, or otherwise, the weightage can be specified here. This weightage gets calculated in the Percentage Task Completion Method by Task Weight.
- Type: If your task can be defined under a particular Task Type, say, User Training or User Demo, you can enter the Task Type here. It can be used to filter the Tasks based on Task Types.
- Color: Each task can be recognized by a different color. This helps in identifying a task while creating Gantt Charts.
- Is Group: This box can be checked to indicate that a task is a parent task, and can be further divided into multiple sub-tasks.
Parent Task: If a particular task is a part of a group task, the parent task can be linked to the task from this field.
2. Features
2.1. Timeline and Details
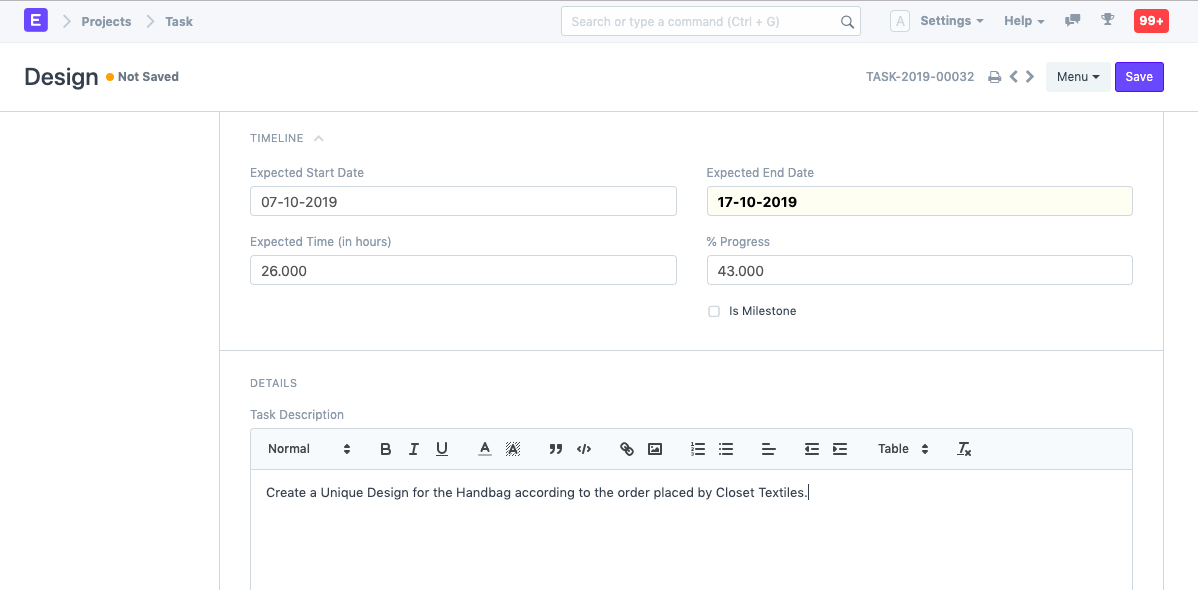
- Expected Start Date: You can enter the date on which you expect the Task to be started.
- Expected End Date: You can enter the date on which you expect this Task to be finished.
- Expected Time: You can enter the number of hours which you expect are going to be spent on this task.
- Progress: You can enter the Progress Percentage of a Task.
- Is Milestone: This box can be checked in the cases where a particular task is a Milestone in a Project.
Description: You can add a description of the task here.
2.2. Dependencies and Actual Time
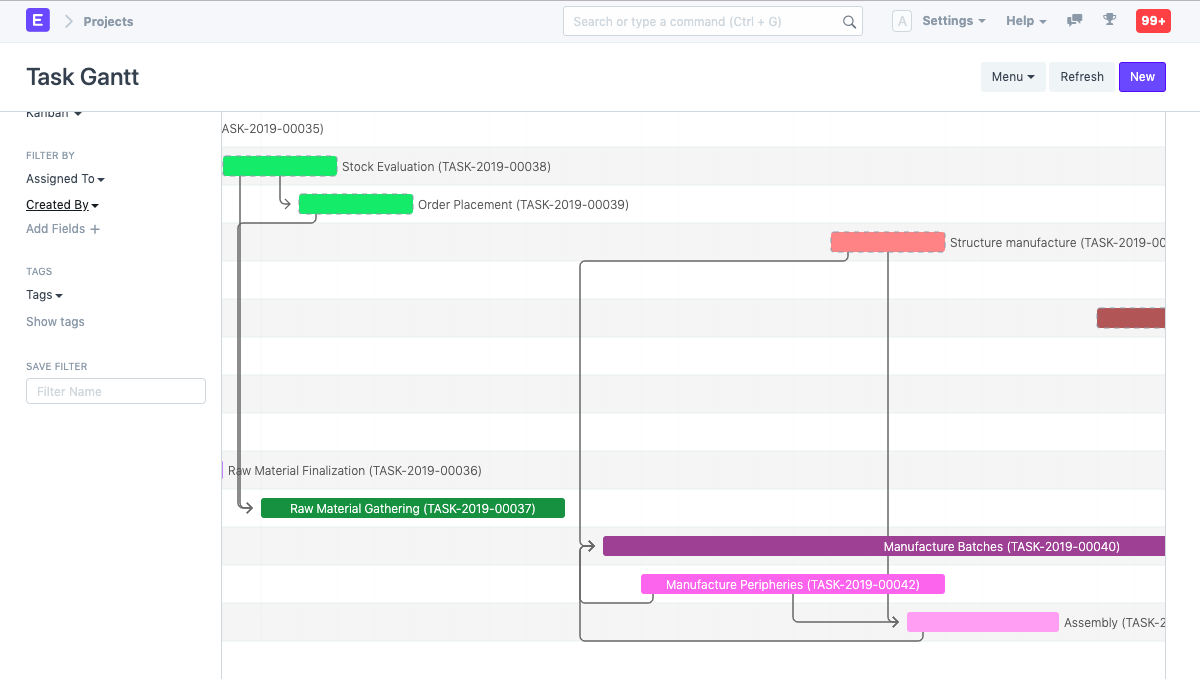
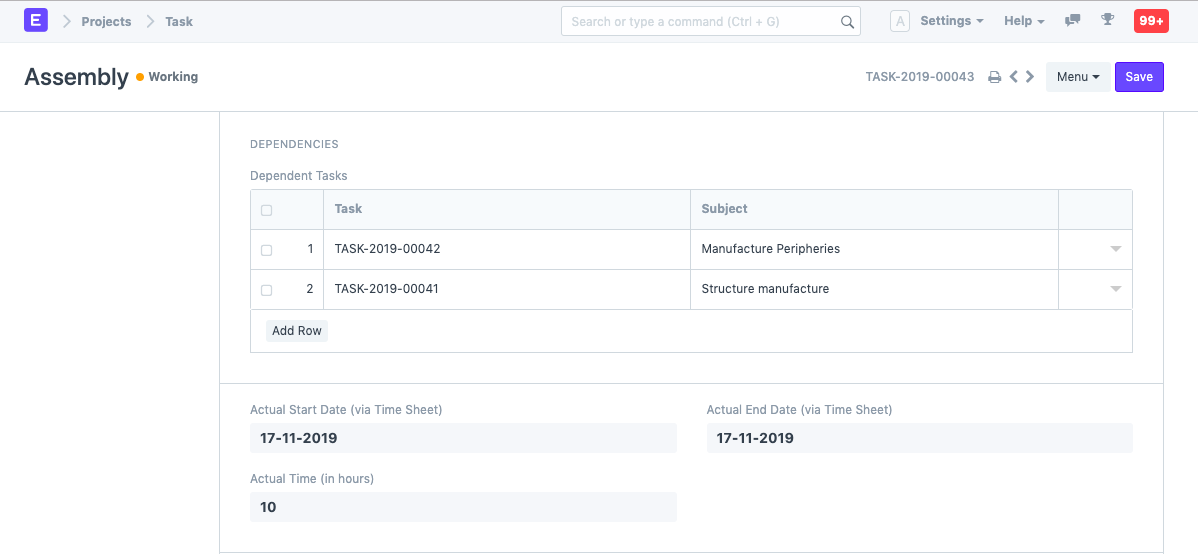
Dependent Tasks: Dependent tasks indicate that a particular task is dependent on another task, and the former cannot be completed before the completion of the latter.
Task dependencies can be viewed in the Gantt Charts in the following way.
Actual Start Date: The actual date and time on which the Task is started get recorded basis the Timesheets.
Actual End Date: The actual date and time on which the task was finished get recorded here via the Timesheets.
2.3. Costing
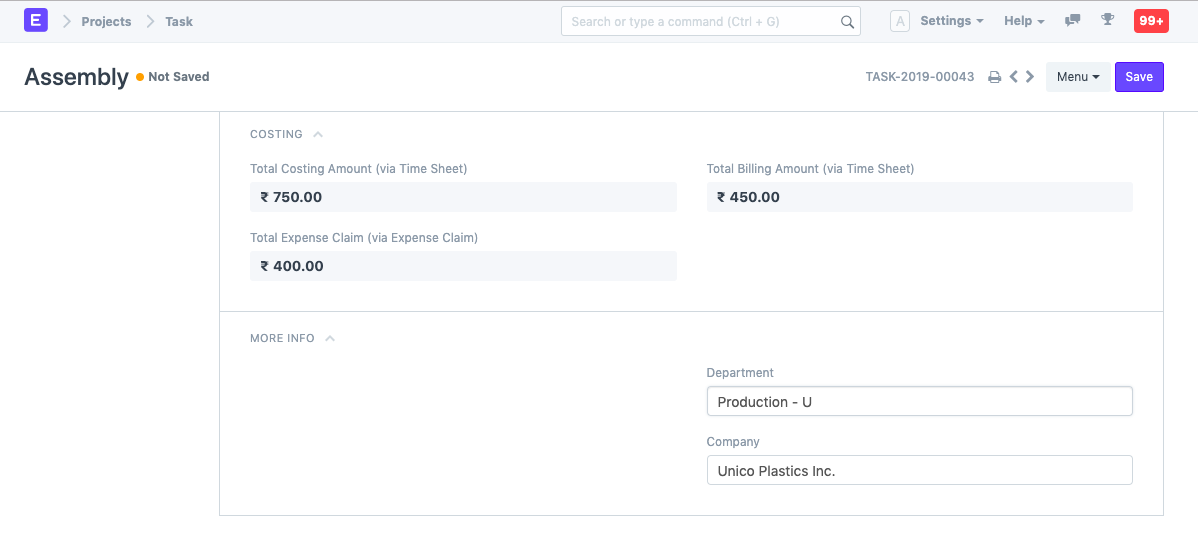
- Total Costing Amount: The Total Costing Amount gets captured here via the Timesheets submitted by the user while working on this task.
- Total Billing Amount: The Total Amount with which the Customer is to be billed via this task gets recorded here form the Timesheets.
- Total Expense Claim: The Total Amount of Expense claimed by an Employee for the completion of this Task gets recorded and reflected here.
2.4. More Info
- Department: You can enter the Owner Department for the task. Irrespective of the Owner department of the Project, each task can be carried out by a different department.
Company: You can change the Company for which this Task is being carried out. This can be used in cases where A company is carrying out the Task for its Sister Company or its Parent Company or a Subsidiary.
