Overwriting Data from Data Import Tool
The Data Import Tool allows importing documents (like customers, Suppliers, Orders, Invoices, etc.) from an Excel/CSV file into ERPNext. The very same tool can also be used for overwriting values in the existing documents.
Overwriting data from Data Import Tool works only for the saved transactions, and not for Submitted ones.
Let's assume there are no. of items for which we need to overwrite Item Group. Following are the steps to overwrite Item Groups for existing Items.
Step 1: Download Template
Template Used for overwriting data will be the same as one used for importing new items. Hence, you should first download the template.
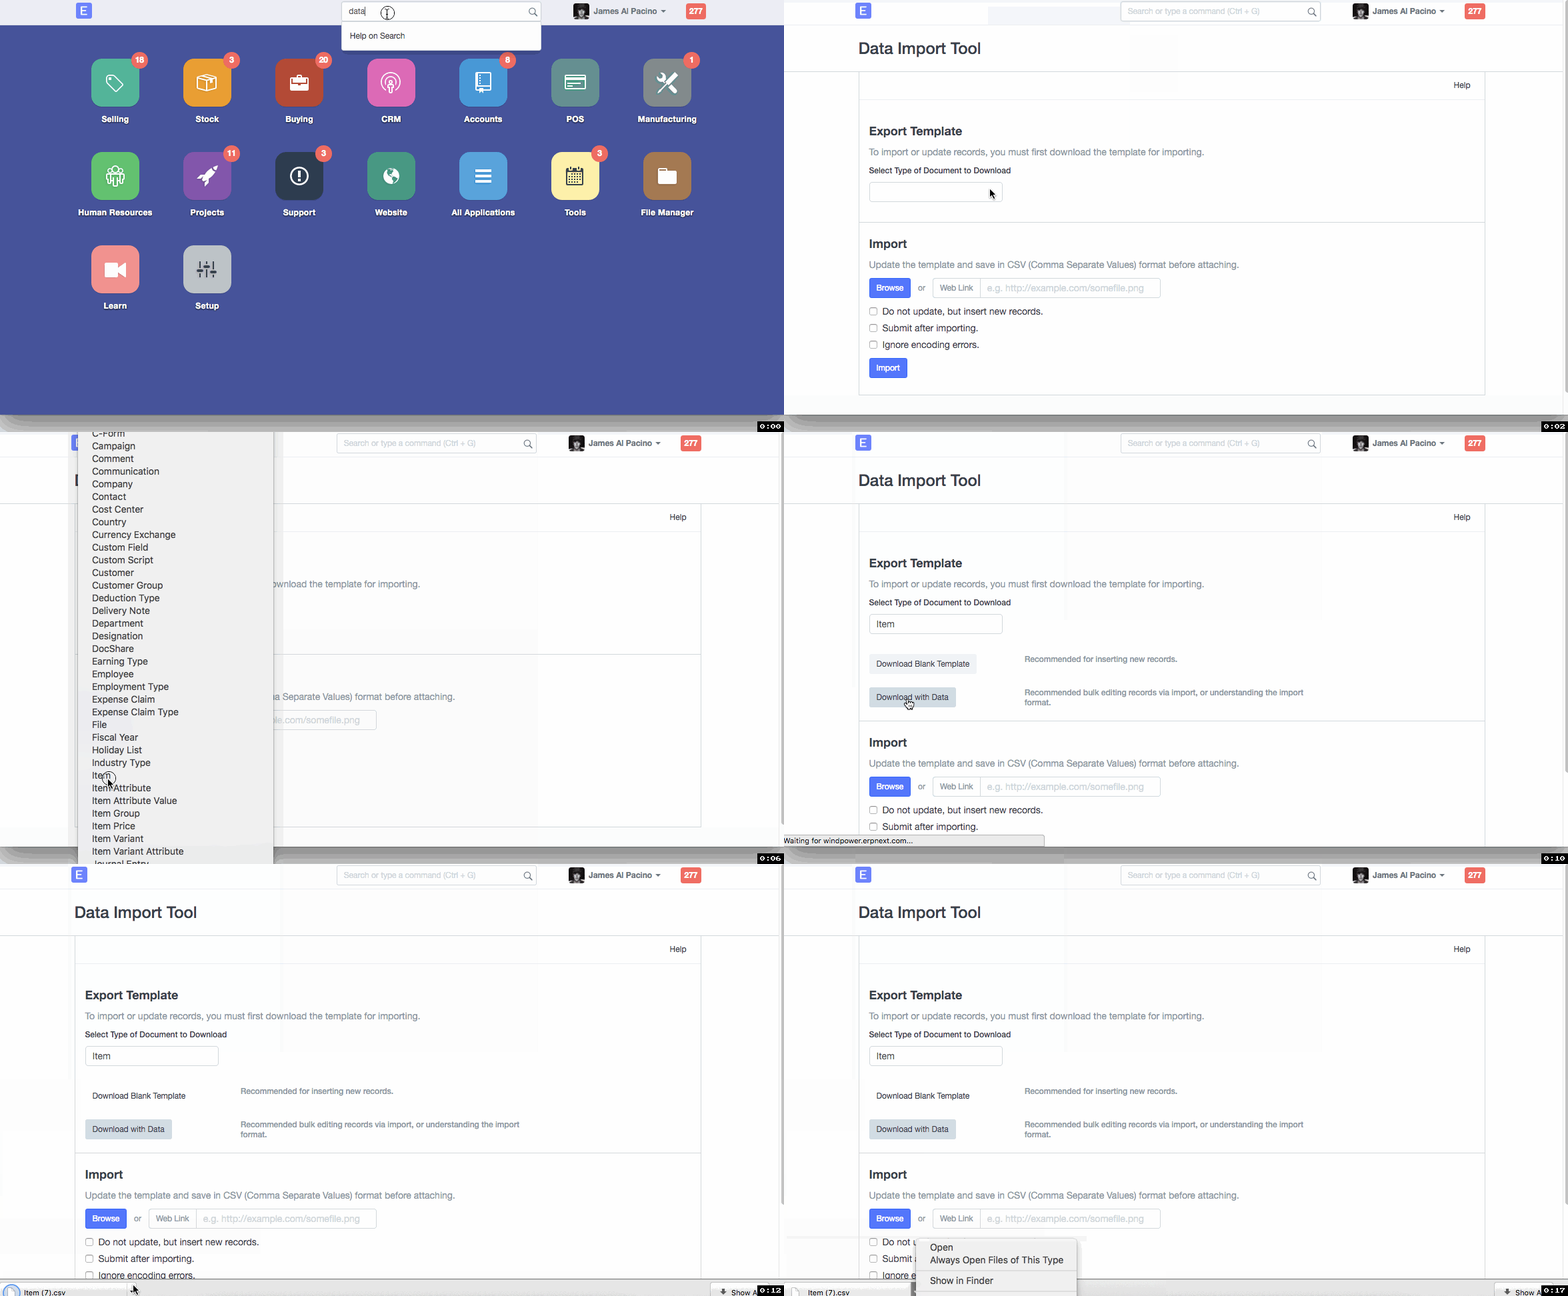
Home > Settings > Data > Import/Export Data
Since items to be over-written will be already available in the system, while downloading the template, click on "Download with data" to get all the existing items in the template.

Step 2: Prepare Data
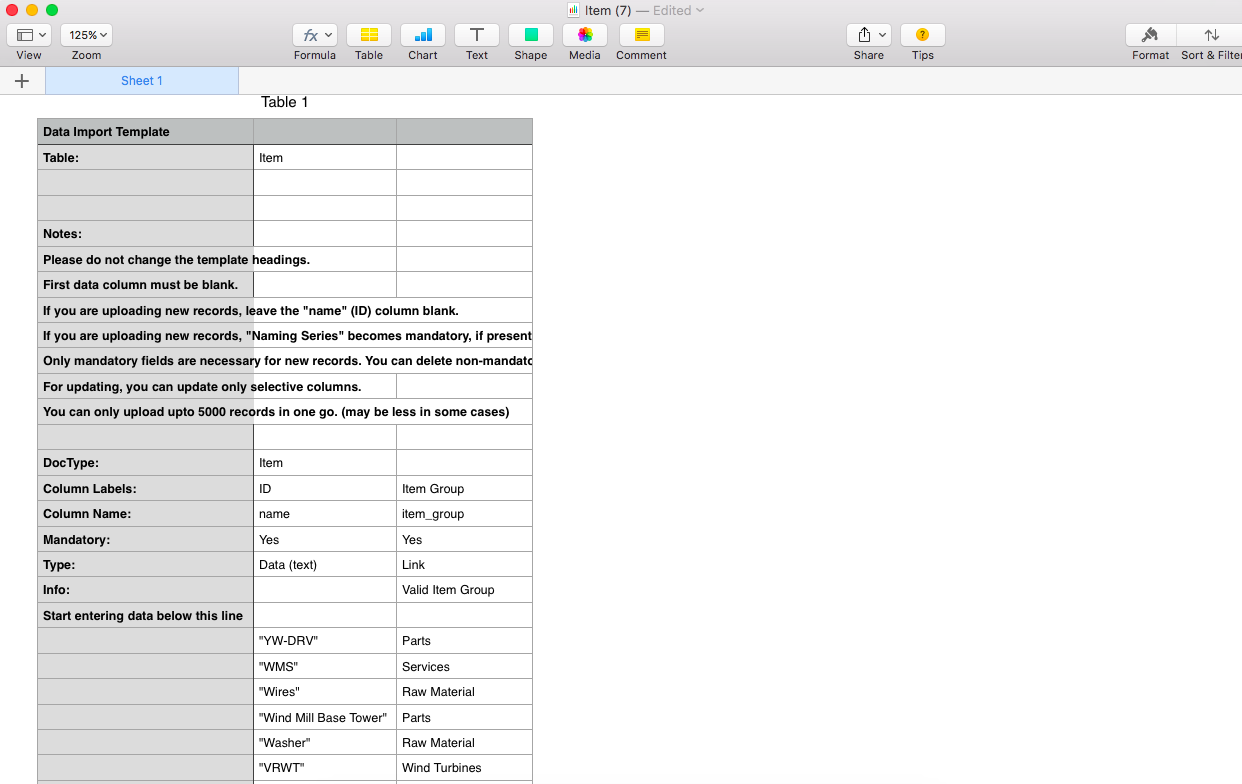
Enter the new value in the Item Group column for an item. Since Item Group is a master in itself, ensure Item Group entered in the spreadsheet file is already added in the Item Group master.

Since we are overwriting only Item Group, only the following columns will be mandatory:
- Column A (since it has main values of the template)
- Name (Column B)
- Item Group
Columns of other fields which won't have any impact can be removed, even if they are mandatory. This is applicable only for overwriting, and not when importing new records.
Step 3: Browse Template
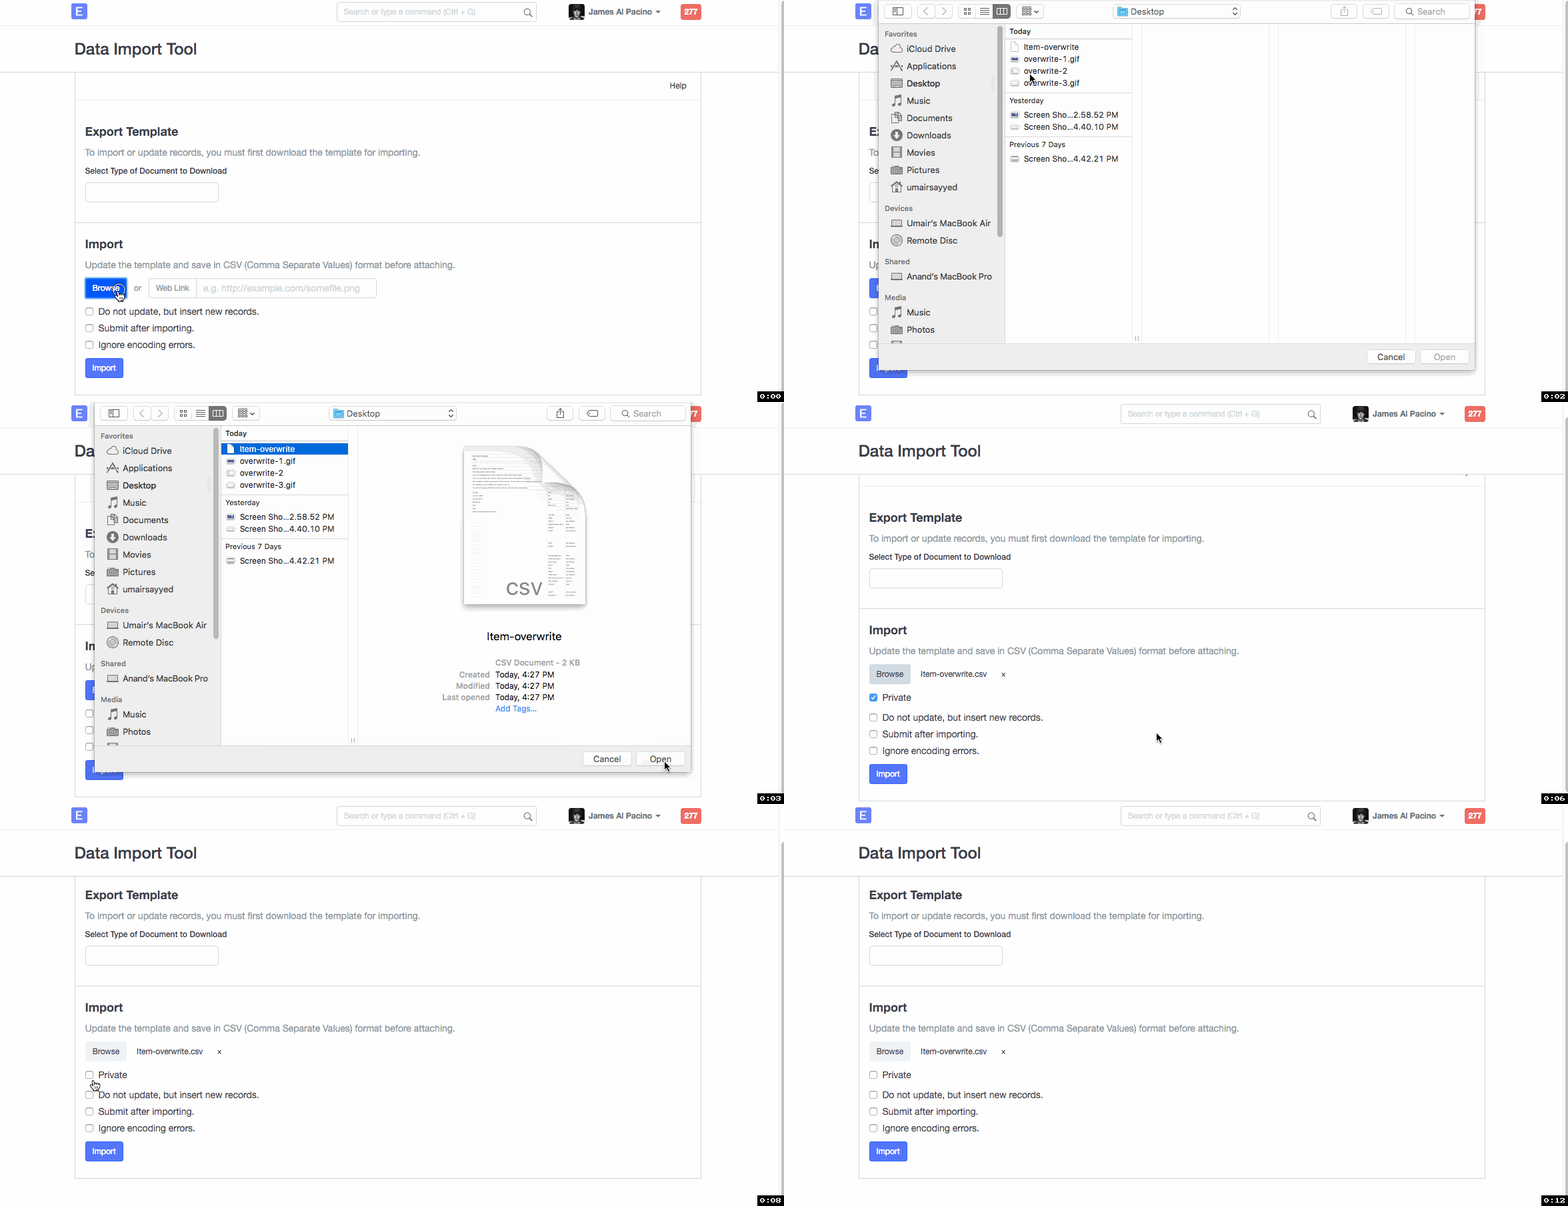
After updating Item Groups in the spreadsheet, come back to Data Import Tool in ERPNext. Browse and select the File/template which has data to be overwritten.

Step 4: Upload
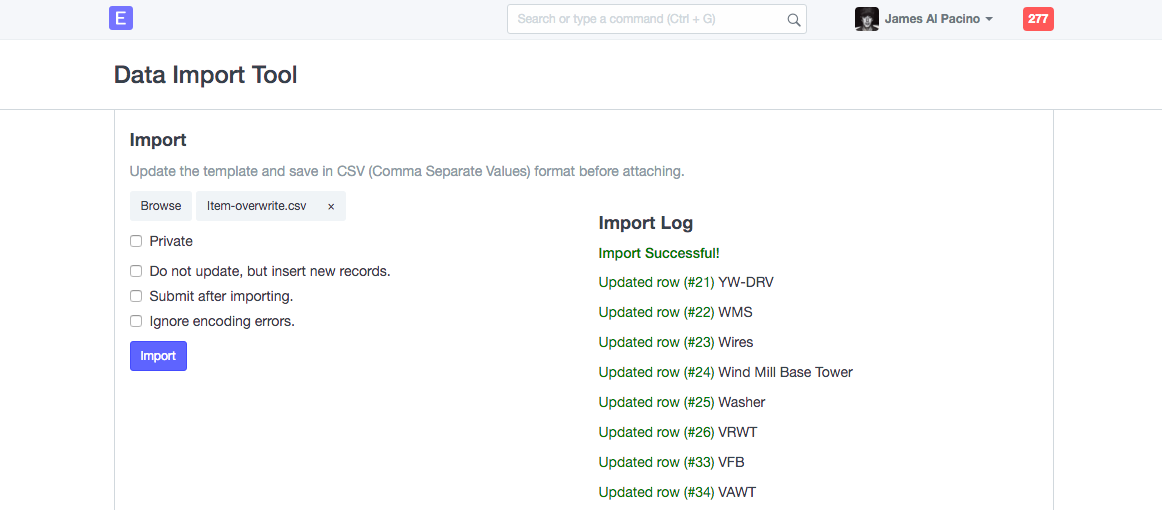
On clicking Import, Item Group will be over-written.

If validation of values fails, then it will indicate row no. of the spreadsheet for which validation failed and needs correction. In that case, you should correct value in that row of the spreadsheet, and then import the same file again. If validation fails even for one row, none of the records are imported/overwritten.